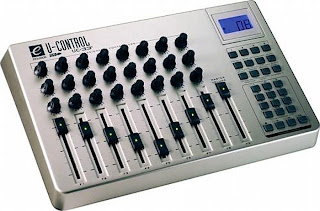
I've had my Evolution UC-33e MIDI control surface for some time now, and I have to say, I've loved it since the moment I opened the package. There's nothing quite like finally getting something you've thoroughly researched, coveted for a while, and then finally you're the first kid on your block to have one.
After the wildfires that devastated southern California back in 2007, I made a resolution to celebrate life. One of the first things I did was to finally kick down for this little beauty. I figured it would change the way I produced, and I was right.
However, I never took the time to really LEARN the manual. Sure, I read it, but I didn't PRACTICE with it. I can't stress how important this is to all the producers out there. If you don't RTFM, you don't deserve all the functionality it offers.
Now, having said that, I have to defend myself a little bit. The UC-33e comes with a layover for Ableton Live. However, there's nothing out of the box that allows you to just get up and running with it. You not only have to program the thing yourself, but you have to know HOW you need to program it, and WHY it's acting weird when you just try to automatically assign MIDI notes to it.
Here's a brief description of what worked for me (see page 12 of the advanced manual):
- I selected preset #31 by clicking RECALL and then typing in 31.
- I assigned the faders and knobs as usual to Live (I'm using version 8.1).
- I clicked "launch button" #1 on the template, then hit ASSIGN, and then typed in 146 (for MIDI CC (on/off), see page 18 of the getting started manual).
- Then hit DATA MSB twice and entered 127 (the value to be sent to the button when you press it).
- Then hit DATA LSB twice and entered 000 (the value to be sent to the button when you stop pressing it).
- Hit Ctrl-M in Live to bring up the MIDI Map screen
- Clicked on the scene launch button for scene 1
- Pressed "launch button" #1
- Repeated this process for the other five launch buttons and the stop all clips, launch clip, clip up and clip down buttons
- Viola!
You actually may not have to do steps 4-5 for each button, I didn't actually have to. Those values were already assigned (you can tell when you click DATA MSB twice fast or DATA LSB twice fast - the number that appears on the display after that is what's assigned.
Special thanks to rictheobscene on this post for guidance:
http://forum.ableton.com/viewtopic.php?t=13538
Happy producing!
Cheers,
-ix
No comments:
Post a Comment